
Deploying Applications to Kubernetes with Helm
Kubernetes supports declarative approach to define its resources. This means you can add configuration on Kubernetes resources in yaml files in which basically you define the state of that particular resource and then deploy those files.
Imperative vs Declarative
Imperative means you use cli commands to create resources. For example,
kubectl run nginx --image=nginx:1.14.2 --port=80The declarative approach is to create a yaml file let’s say nginx-pod.yaml with following contents
apiVersion: v1
kind: Pod
metadata:
  name: nginx
spec:
  containers:
  - name: nginx
    image: nginx:1.14.2
    ports:
    - containerPort: 80
and then apply the yaml file. Such yaml files are called Kubernetes manifests.
kubectl apply -f nginx-pod.yamlAs you can see that obvious benefit of declarative approach is that you can put yaml files in version control tool like github and it will be a lot easier to do future updates as configuration is saved. It’s hard to do the same with imperative approach.
What is Helm and how its helps?
Helm is the package manager for Kubernetes just like yum or apt. Helm deploys charts which are packaged Kubernetes software or microservices.
While declarative approach is great it can become cumbersome to deal with yamls if you have hundreds or thousands of microservices as per microservice at least you will need 3 yaml manifest files (For Dev, Non-Production and Production environments) and that too with duplicated code and hardcoded values . Hence making changes and maintaining can be issues prone and nightmare for DevOps.
Helm provides a solution to this using templating and hence producing re-usable code with no hardcoding.
Helm is not just a package manager, it is also have other features like configuration management, hooks, rollbacks.
In addition to this Helm has huge user base and hence strong community. You can get pre-built helm charts for popular tools from repositories. You can find such repositories at https://artifacthub.io/
Please note helm itself uses commands and hence is imperative.
Set up lab for helm
Let’s first quickly set up a lab to learn helm
In order to learn helm, we need kubernetes cluster and helm.
We will first install kind. Please follow this link -> Install Kind
Now create kubernetes cluster. If you followed above link and already created, then skip this step.
kind create cluster -n test-helm --image kindest/node:v1.24.7Now let’s use docker to have isolated environment for learning.
docker run -it --rm -v ${HOME}:/root/ -v ${PWD}:/work -w /work --net host alpine shNow lets install kubectl as well. We won’t use kubectl for deployment but we will use it to verify our deployments.
apk add --no-cache curl
curl -LO https://storage.googleapis.com/kubernetes-release/release/`curl -s https://storage.googleapis.com/kubernetes-release/release/stable.txt`/bin/linux/amd64/kubectl
chmod +x ./kubectl
mv ./kubectl /usr/local/bin/kubectl
Verify our cluster
/work # kubectl get nodes
NAME                      STATUS   ROLES           AGE   VERSION
test-helm-control-plane   Ready    control-plane   11m   v1.24.7
Now install helm
curl -LO https://get.helm.sh/helm-v3.10.3-linux-amd64.tar.gz
tar -C /tmp/ -zxvf helm-v3.10.3-linux-amd64.tar.gz
rm helm-v3.10.3-linux-amd64.tar.gz
mv /tmp/linux-amd64/helm /usr/local/bin/helm
chmod +x /usr/local/bin/helm
Verify installation
work # helm version
version.BuildInfo{Version:"v3.10.3", GitCommit:"835b7334cfe2e5e27870ab3ed4135f136eecc704", GitTreeState:"clean", GoVersion:"go1.18.9"}
This finish all installations we need to start creating and deploying helm charts.
Deploy first helm chart
Before we create our own custom chart, first we will deploy a pre-built helm charts to our cluster.
You can search pre-built helm repositories from https://artifacthub.io/ which are available for public use.
We will install nginx from bitnami repository. In order to do this, we need to add the repository and then install the chart.
/work # helm repo add my-bitnami-repo https://charts.bitnami.com/bitnami
"my-bitnami-repo" has been added to your repositories
The above will add bitnami repo to my local. You can name it anything. I have named it my-bitnami-repo.
You can perform a search to see all charts available for use. Bitnami has really good charts available.
helm search repo my-bitnami-repoNow we will install our nginx chart. I am calling it my-nginx-release and you can choose a name of your choice or use same. It can be anything.
/work # helm install my-nginx-release my-bitnami-repo/nginx
NAME: my-nginx-release
LAST DEPLOYED: Fri Dec 23 02:23:16 2022
NAMESPACE: default
STATUS: deployed
REVISION: 1
TEST SUITE: None
NOTES:
CHART NAME: nginx
CHART VERSION: 13.2.20
APP VERSION: 1.23.3

** Please be patient while the chart is being deployed **
NGINX can be accessed through the following DNS name from within your cluster:

    my-nginx-release.default.svc.cluster.local (port 80)

To access NGINX from outside the cluster, follow the steps below:

1. Get the NGINX URL by running these commands:

  NOTE: It may take a few minutes for the LoadBalancer IP to be available.
        Watch the status with: 'kubectl get svc --namespace default -w my-nginx-release'

    export SERVICE_PORT=$(kubectl get --namespace default -o jsonpath="{.spec.ports[0].port}" services my-nginx-release)
    export SERVICE_IP=$(kubectl get svc --namespace default my-nginx-release -o jsonpath='{.status.loadBalancer.ingress[0].ip}')
    echo "http://${SERVICE_IP}:${SERVICE_PORT}"
Let’s check with kubectl
/work # kubectl get deployment
NAME               READY   UP-TO-DATE   AVAILABLE   AGE
my-nginx-release   1/1     1            1           116s

/work # kubectl get pods
NAME                                READY   STATUS    RESTARTS   AGE
my-nginx-release-5f66c8c65b-nfl78   1/1     Running   0          56s

/work # kubectl get svc
NAME               TYPE           CLUSTER-IP      EXTERNAL-IP   PORT(S)        AGE
kubernetes         ClusterIP      10.96.0.1       <none>        443/TCP        41m
my-nginx-release   LoadBalancer   10.96.139.231   <pending>     80:31031/TCP   87s
As you see above it tries to create a Load Balancer above but since we have local cluster, it is in pending state.
Let’s open another terminal and expose the pod as we do not have load balancer and hence cannot use service as mentioned in helm install description logs above. (NOTE: Do not run inside the docker but on local OS/HOST)
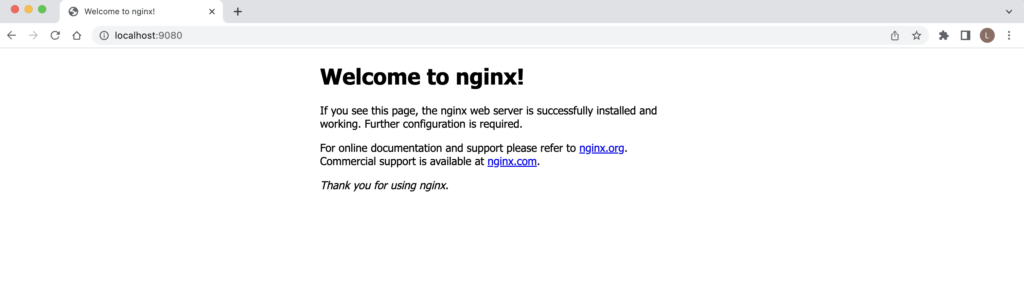
$ kubectl port-forward pod/my-nginx-release-5f66c8c65b-nfl78 9080:8080 Let’s check http://localhost:9080
So we have successfully deployed a helm chart into our cluster. Instead of kubectl, we used helm cli.
We can also modify some values like change container port from 8080 to 8090. (Note: We won’t be able to change to 80 as it is a privileged port and nginx chart we are deploying has security context enabled. I am not explaining security context as it is out of scope of this blog.)
We need to run following command
helm show values my-bitnami-repo/nginxYou will see a huge list of values but what we are interested in is as follows:
## Configures the ports NGINX listens on
## @param containerPorts.http Sets http port inside NGINX container
## @param containerPorts.https Sets https port inside NGINX container
##
containerPorts:
  http: 8080
  https: ""
Or better we can check here: https://artifacthub.io/packages/helm/bitnami/nginx
We can now change port as follows
We will delete and install again.
helm uninstall my-nginx-release
helm install --set containerPorts.http=8090 my-nginx-release my-bitnami-repo/nginx
Verify pod
/work # kubectl get pods
NAME                               READY   STATUS    RESTARTS   AGE
my-nginx-release-557bd4598-h29ds   1/1     Running   0          3m24s
Now we will expose the pod on local OS/HOST in another terminal
kubectl port-forward pod/my-nginx-release-557bd4598-h29ds 3080:8090Verify in browser http://localhost:3080

So that’s how you can install a predefined helm chart.
Creating Custom chart with Helm
Now we will head into creating our own custom helm chart. We will create our resources as Helm templates to understand its benefits
We will create a simple chart myfirstchart
/work # helm create myfirstchart
Creating myfirstchart
It will generate a boiler plate code as files as follows:
/work/myfirstchart # ls -lrt
total 8
-rw-r--r--    1 root     root          1879 Dec 23 03:14 values.yaml
drwxr-xr-x   10 root     root           320 Dec 23 03:14 templates
drwxr-xr-x    2 root     root            64 Dec 23 03:14 charts
-rw-r--r--    1 root     root          1148 Dec 23 03:14 Chart.yaml
Let’s delete everything under tempaltes
/work/myfirstchart # rm -rf templates/*Now let’s create our first template by creating a file myfirstchart/templates/configmap.yaml with below contents
apiVersion: v1
kind: ConfigMap
metadata:
  name: myfirstchart-configmap
data:
  myvalue: "Hello World"
And now we will install the chart
/work # helm install my-cutom-chart ./myfirstchart
NAME: my-cutom-chart
LAST DEPLOYED: Fri Dec 23 03:21:36 2022
NAMESPACE: default
STATUS: deployed
REVISION: 1
TEST SUITE: None
We can see configmap is created in our cluster
/work # kubectl get configmap
NAME                     DATA   AGE
kube-root-ca.crt         1      99m
myfirstchart-configmap   1      90s
helm let us retrieve the release and see the actual template that was loaded as follows
/work # helm get manifest my-cutom-chart
---
# Source: myfirstchart/templates/configmap.yaml
apiVersion: v1
kind: ConfigMap
metadata:
  name: myfirstchart-configmap
data:
  myvalue: "Hello World"
Now we will uninstall and try to remove some hardcoding
helm uninstall my-cutom-chartModify the myfirstchart/templates/configmap.yaml file to below
apiVersion: v1
kind: ConfigMap
metadata:
  name: {{ .Release.Name }}-configmap
data:
  myvalue: "Hello World"
We have used in built helm variable which will be set to whatever release name we set. Now lets deploy again with release name my-template-demo
/work # helm install my-template-demo ./myfirstchart
NAME: my-template-demo
LAST DEPLOYED: Fri Dec 23 03:29:26 2022
NAMESPACE: default
STATUS: deployed
REVISION: 1
TEST SUITE: None
Now we will check what was deployed
/work # helm get manifest my-template-demo
---
# Source: myfirstchart/templates/configmap.yaml
apiVersion: v1
kind: ConfigMap
metadata:
  name: my-template-demo-configmap
data:
  myvalue: "Hello World"
As you can see name metadata is set according to release name we choose.
We can also define our own Variables in myfirstchart/values.yaml which was autogenerated. Delete everything inside this file and just add
myMessage: "Helm is awesome"Now modify the myfirstchart/templates/configmap.yaml as follows
apiVersion: v1
kind: ConfigMap
metadata:
  name: {{ .Release.Name }}-configmap
data:
  myvalue: {{ .Values.myMessage }}
As you can see we changed myValue to pick value from values.yaml file.
Let’s install a new helm release now.
work # helm install my-template-demo-2 ./myfirstchart
NAME: my-template-demo-2
LAST DEPLOYED: Fri Dec 23 03:37:32 2022
NAMESPACE: default
STATUS: deployed
REVISION: 1
TEST SUITE: None
Lets verify changes
/work # helm get manifest my-template-demo-2
---
# Source: myfirstchart/templates/configmap.yaml
apiVersion: v1
kind: ConfigMap
metadata:
  name: my-template-demo-2-configmap
data:
  myvalue: Helm is awesome
As you can see value got picked up from values.yaml file
DevOps Tip: You can just store these files and folders in a github repository and then in your CICD pipeline you can run helm commands. You won’t have to publish these charts like predefined charts.
Multiple environments with Helm
Till now you have learned how to use Helm to deploy your kubernetes resources. Now before we end this article let’s talk about how to use Helm with multiple environments. There can be many approaches but I am going to explain a simple one.
In real projects, you will have to deploy your resources to different environments and hence there will be some environment specific values as well.
We will add one more file myfirstchart/values-dev.yaml and add below:
env: developmentNow we will add this variable to myfirstchart/values.yaml as well
myMessage: "Helm is awesome"
env: localhost
As you can see we added same in values.yaml to have default value.
In the end, we also need to modify our myfirstchart/templates/configmap.yaml file to use new variable
apiVersion: v1
kind: ConfigMap
metadata:
  name: {{ .Release.Name }}-{{ .Values.env }}-configmap
data:
  myvalue: {{ .Values.myMessage }}
We modified name metadata to add env.
Now we will deploy new release as below. The values.yaml is read first and the values-dev.yaml we use in below command will overwrite any matching values.
/work # helm install my-multienv-demo -f myfirstchart/values-dev.yaml ./myfirstchart
NAME: my-multienv-demo
LAST DEPLOYED: Fri Dec 23 04:03:31 2022
NAMESPACE: default
STATUS: deployed
REVISION: 1
TEST SUITE: None
Let’s check what we deployed
/work # helm get manifest my-multienv-demo
---
# Source: myfirstchart/templates/configmap.yaml
apiVersion: v1
kind: ConfigMap
metadata:
  name: my-multienv-demo-development-configmap
data:
  myvalue: Helm is awesome
As you can see, it picked up value from values-dev.yaml file for env.
So this way you add all common variables in values.yaml and environment specific variables in files like values-<env>.yaml and use them in your CICD pipeline to set environment specific values.
Conclusion
That’s all!! We finished learning basics of helm. I hope you understand the benefits of helm. For DevOps it is a must learn tool as it is used by many companies. Do try to practice all above. Best of luck!